-

-
 1. Cut 6 feet of fishing wire, string one end through a tapestry needle and tie a big knot at the other end.
 -
 You want to make sure the knot won't go though the flowers.
 -
 2. Begin the beheading, cutting just above the stem.
 -
 3. Insert the needle through the base of the first flower and through the front of the bloom.
 -
 3. Insert the needle through the base of the first flower and through the front of the bloom.
 -
 5. Continue adding marigolds until you have have a long and bountiful chain.
 -
 6. Roll into a circle and place it in the fridge until ready to use.
 -

-

-

-

-


How To Make a Marigold Chain
I used to be work neighbors with my friends Holly and Becky of Hollyflora and sometimes (more like daily) I would visit the girls on my lunch break. Mostly we would chat about life and work but every now and then they would humor me and allow me to assist with whatever project in which they were engrossed (need a boutonniere? call me). One day, they were prepping for an elaborate fall wedding and putting together marigold chains. I ended up staying for hours, stringing the flowers together and falling for their bright orange charm. Since then, I’ve chained up many a marigold and find the action relaxing and satisfying. And the result couldn’t be prettier. You will need: 3 or 4 bunches of marigolds, fishing wire (about 6′), scissors and a tapestry needle. The length of your chain depends on the size of your table, so adjust accordingly. It’s such a dramatic effect and so simple to put together.
INSTRUCTIONS
1. Cut 6 feet of fishing wire, string one end through a tapestry needle and tie a big knot at the other end.You want to make sure the knot won’t go though the flowers.
2. Begin the beheading, cutting just above the stem.
3. Insert the needle through the base of the first flower and through the front of the bloom.
4. Pull the needle all the way through.
5. Continue adding marigolds until you have have a long and bountiful chain.(make sure you leave some beheaded flowers aside to add to your table).
6. Roll into a circle and place it in the fridge until ready to use.
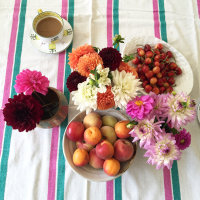
SETTING THE TABLE
Carefully drape the marigold chain down the center of your table. It looks best when it looks organic (rather than in a straight line) so create a small pile of blooms at every foot or so. Then scatter whatever flowers you have left over around the edge of the chain. I think it looks gorgeous like this but if you’re really looking to knock people’s socks off you can add several bright flower arrangements.